Picaro.AI Setup
This page walks you through the initial setup of Picaro.AI in three steps: Create your account → Connect Vendor/Seller account → Connect Advertising API.
Step 1: Create Your Account
Section titled “Step 1: Create Your Account”1-1. Open the sign-up page and fill in your details
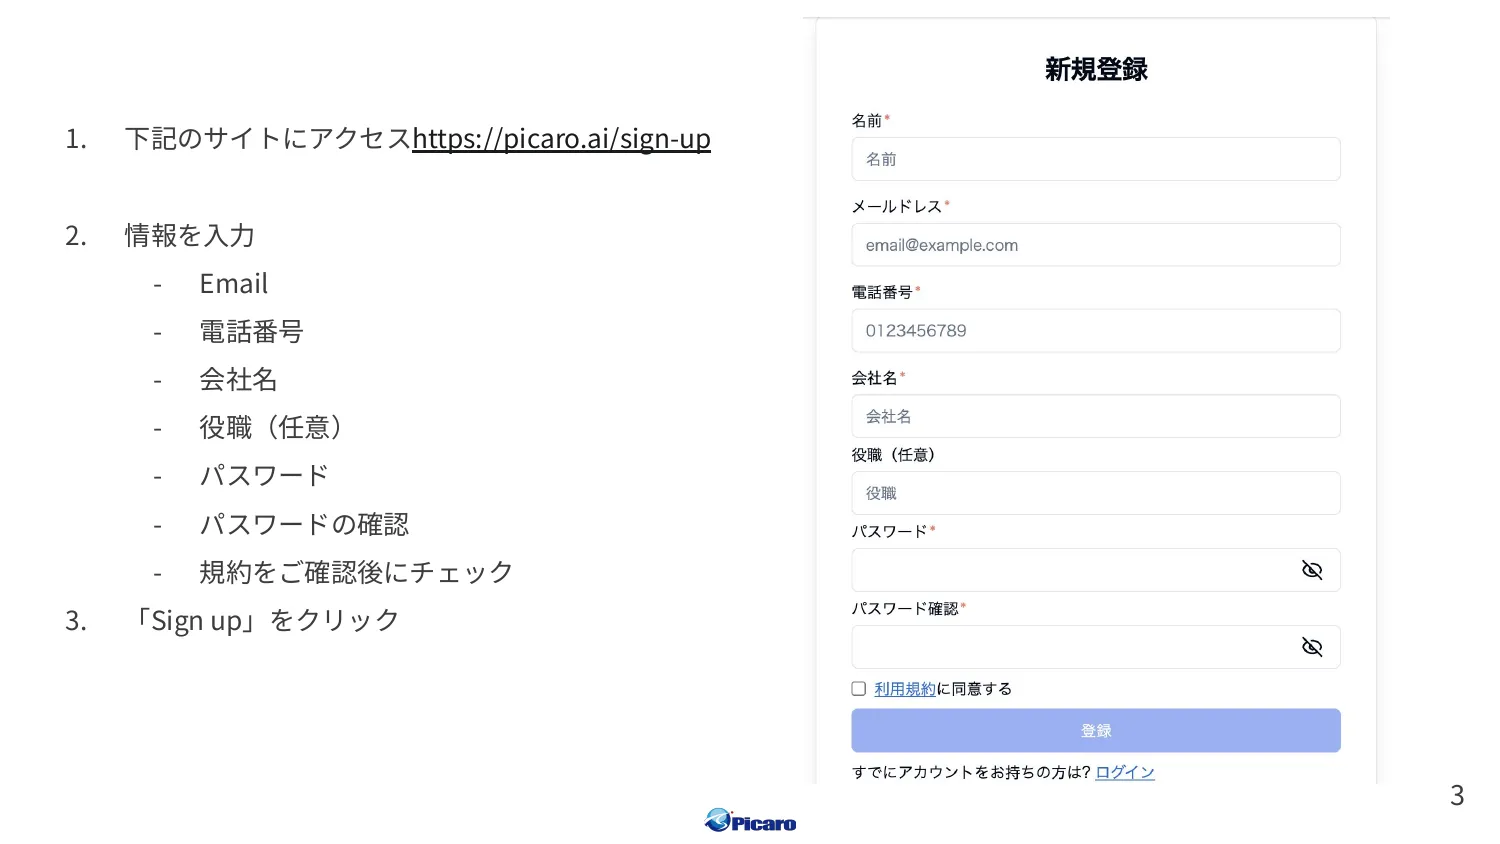
Section titled “1-1. Open the sign-up page and fill in your details”Visit https://picaro.ai/sign-up and fill in the required fields.
- Phone number
- Company name
- Role (optional)
- Password
- Confirm password
- Check the box after reviewing the terms
Click “Sign up” to submit.
1-2. Verify via email
Section titled “1-2. Verify via email”A confirmation email will arrive at your registered address. Click the “Log In” button in that email.

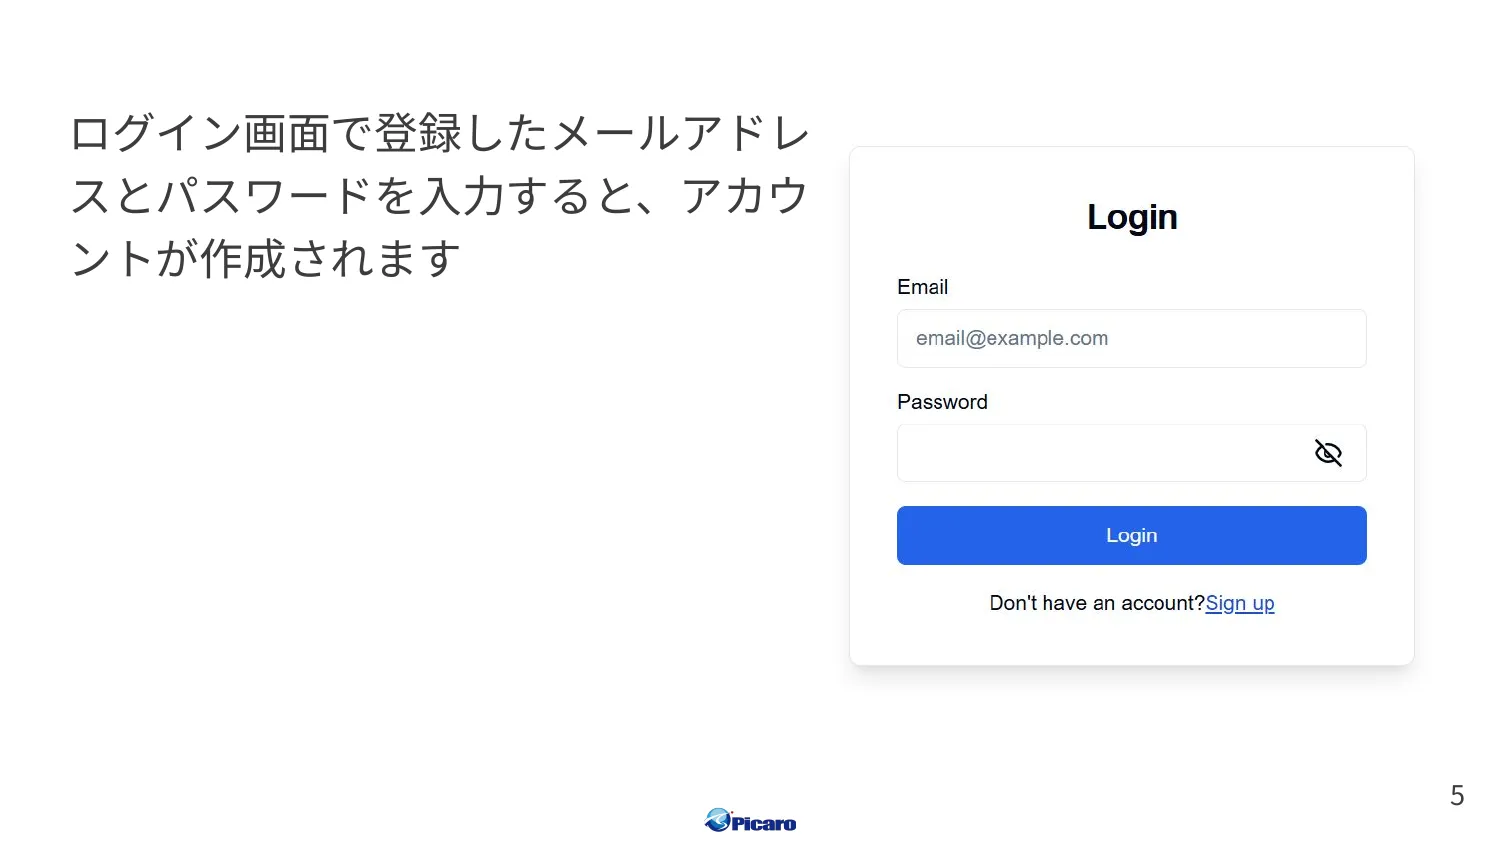
1-3. Sign in with email and password
Section titled “1-3. Sign in with email and password”Enter the email and password you just registered. Your account will be created and you’ll land on the Picaro.AI dashboard.
Step 2: Connect Your Vendor / Seller Account
Section titled “Step 2: Connect Your Vendor / Seller Account”Connect your Amazon Vendor or Seller account to Picaro.AI so sales and inventory data flow in.
2-1. Open Agent Settings
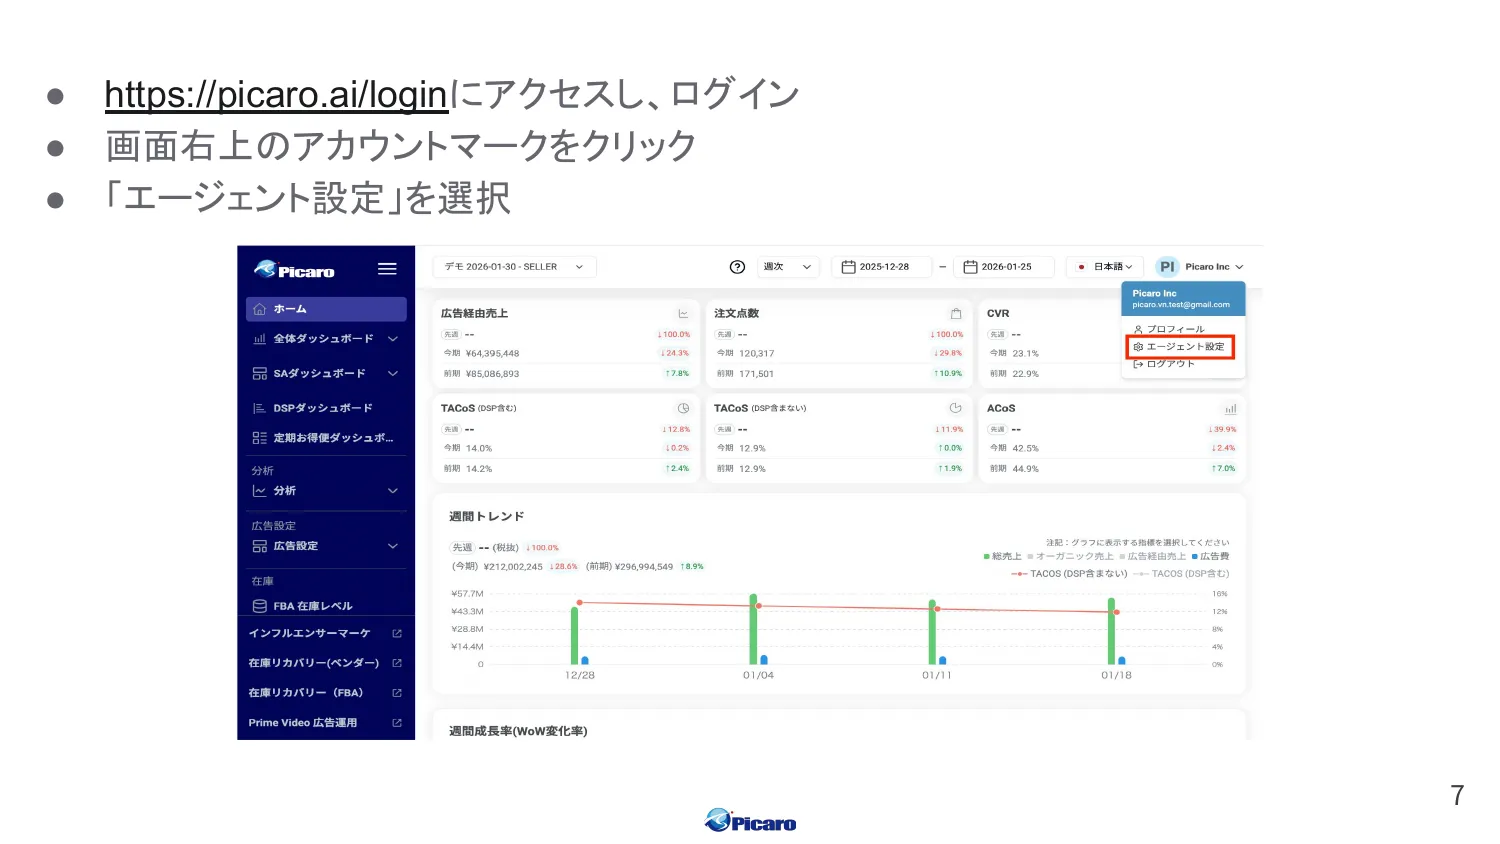
Section titled “2-1. Open Agent Settings”- Sign in at https://picaro.ai/login
- Click the account icon in the top right
- Choose “Agent Settings”
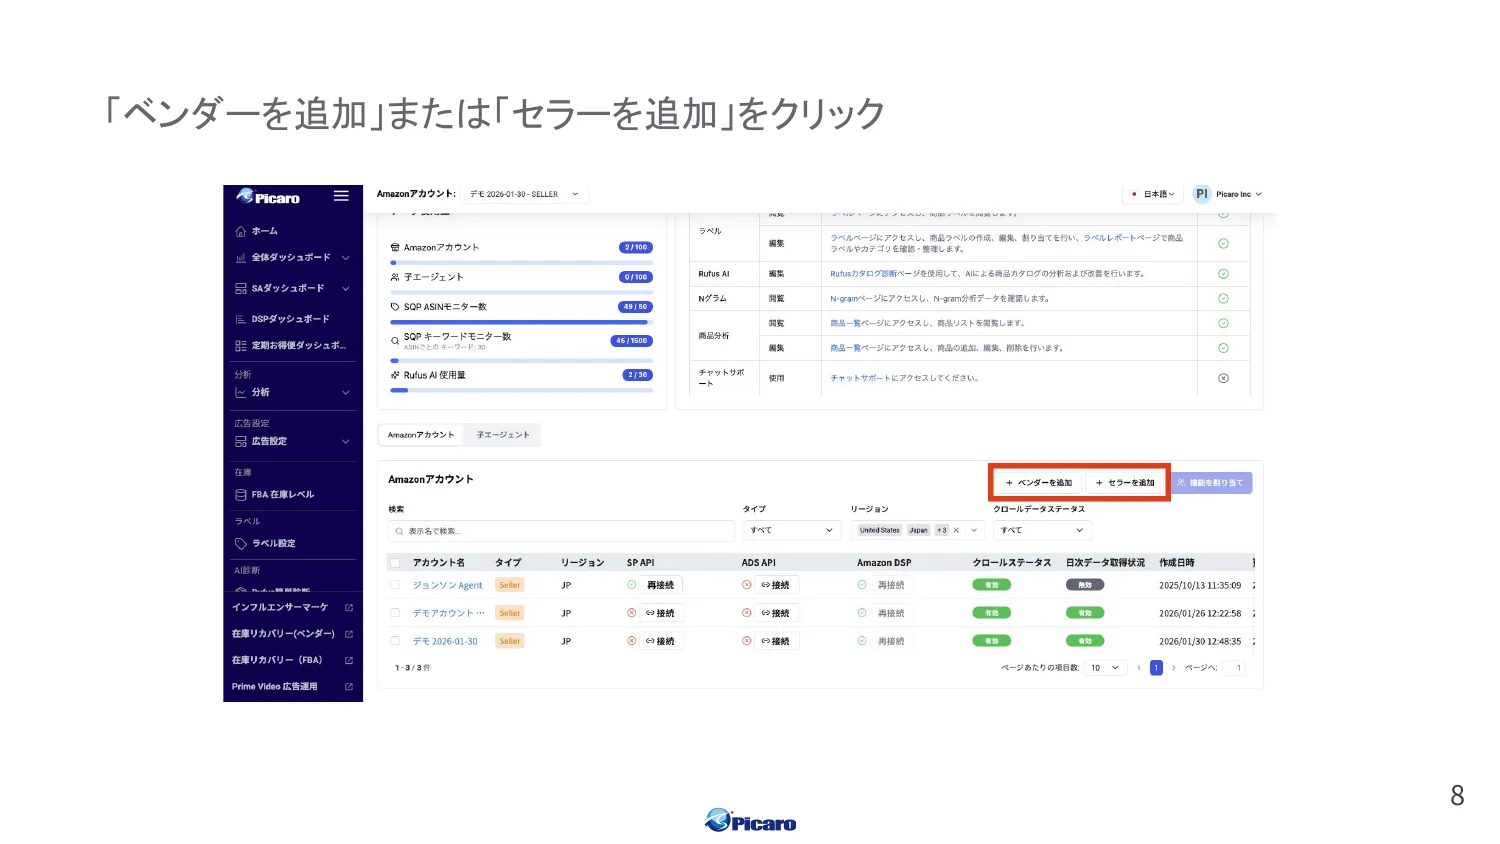
2-2. Add Vendor or Seller
Section titled “2-2. Add Vendor or Seller”- For Seller Central: click “Add Seller”
- For Vendor Central: click “Add Vendor”
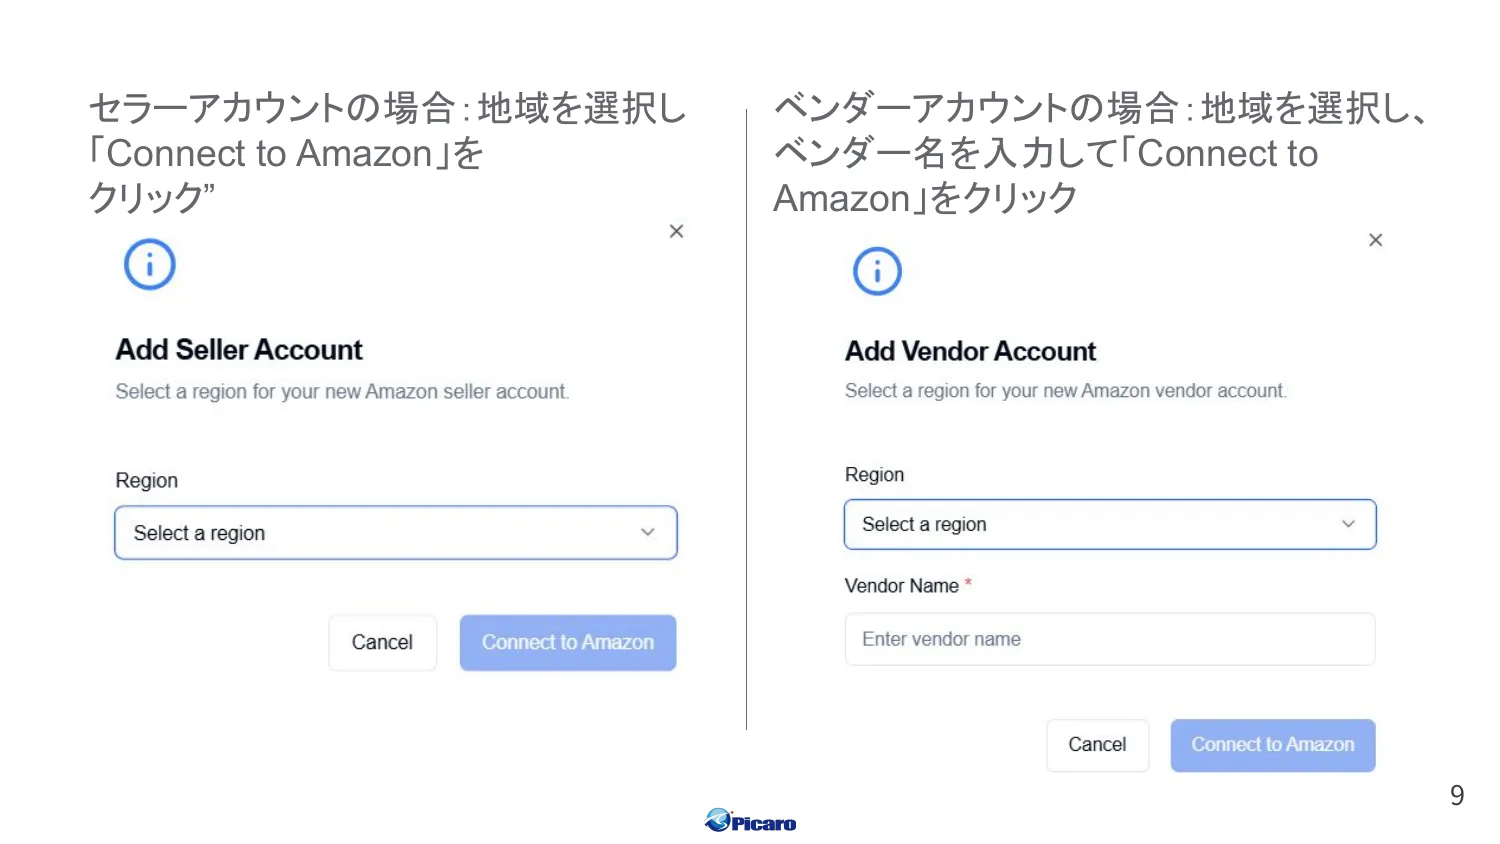
2-3. Select region and start the connection
Section titled “2-3. Select region and start the connection”| Account type | Action |
|---|---|
| Seller | Select region → click “Connect to Amazon” |
| Vendor | Select region + enter vendor name → click “Connect to Amazon” |
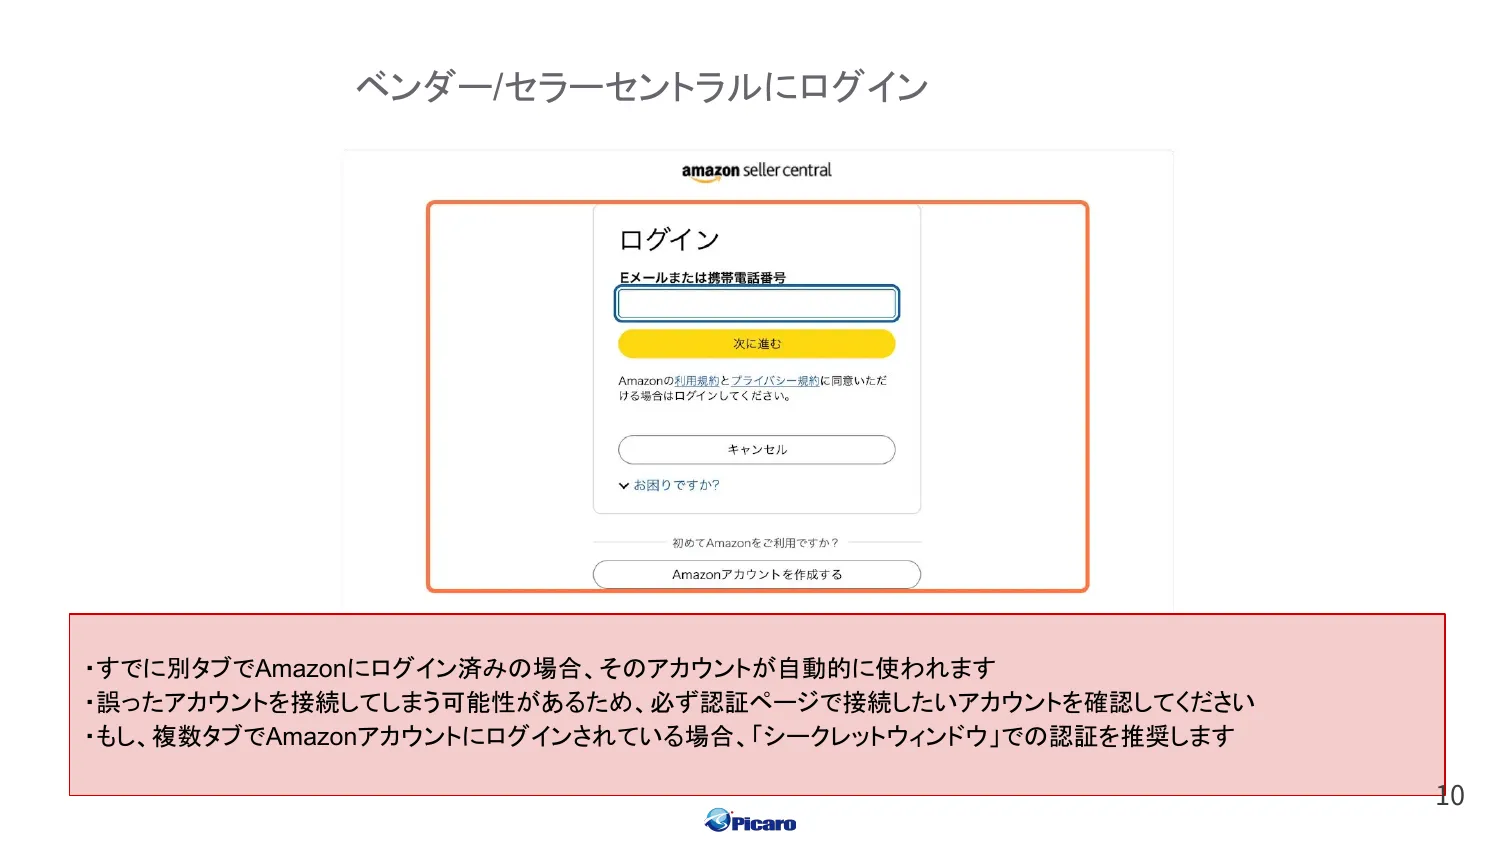
2-4. Sign in to Vendor / Seller Central
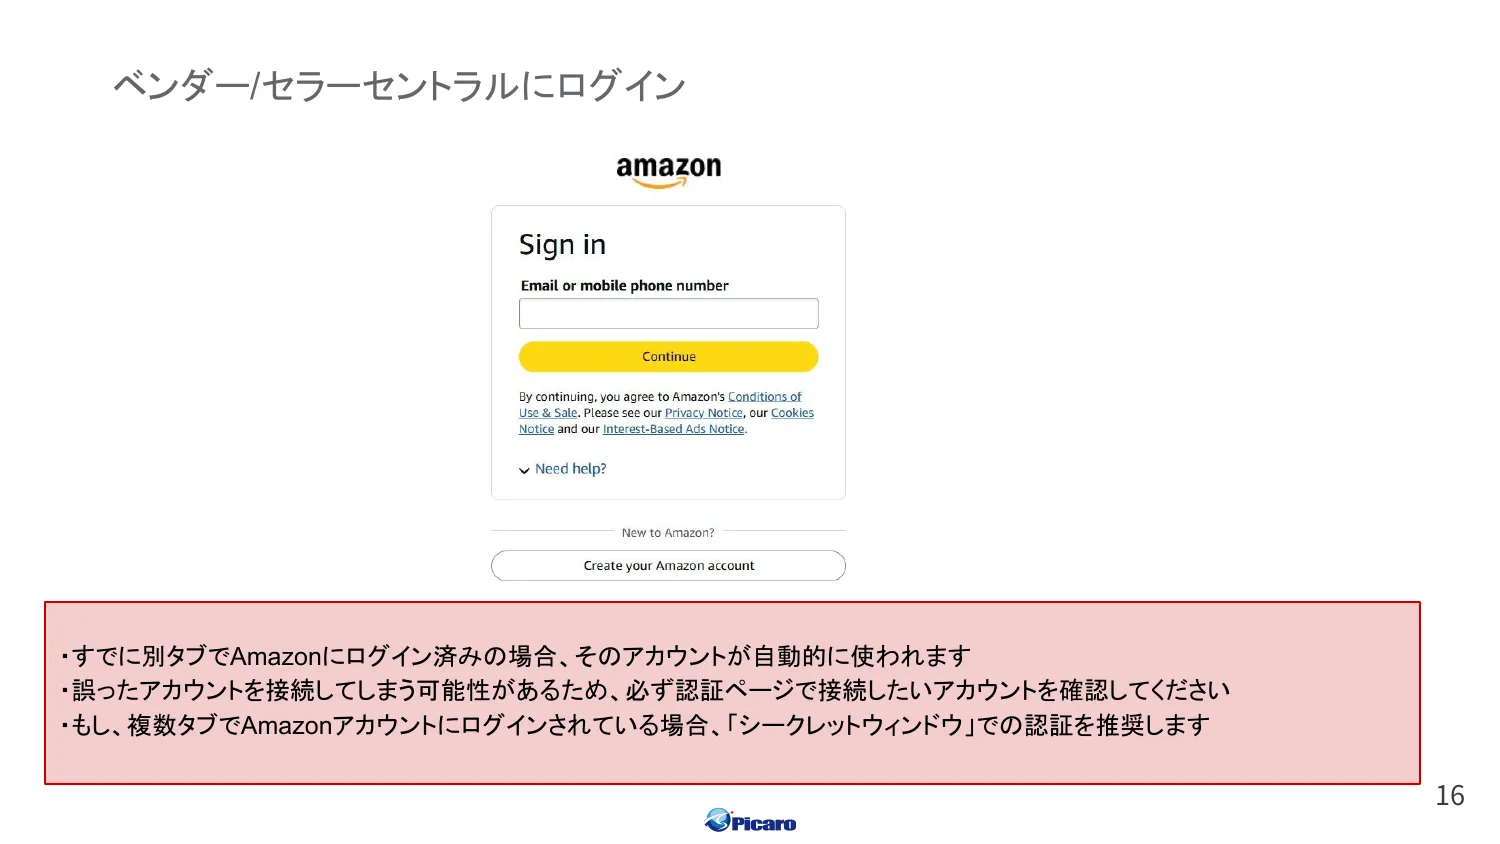
Section titled “2-4. Sign in to Vendor / Seller Central”You’ll be redirected to Amazon’s sign-in screen. Sign in with the account you want to connect to Picaro.AI.
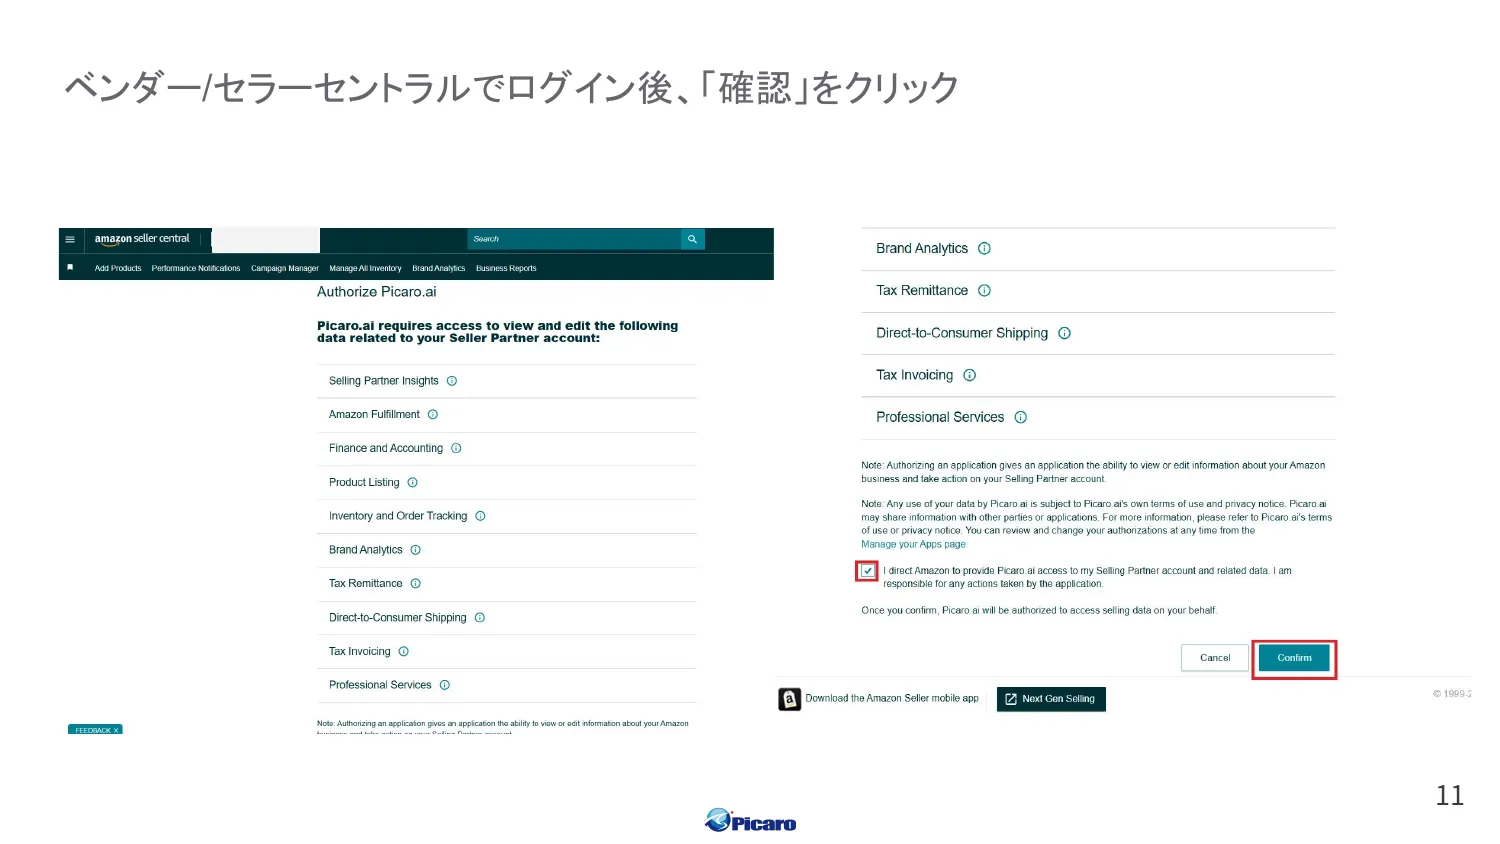
2-5. Complete authentication
Section titled “2-5. Complete authentication”After signing in to Vendor / Seller Central, click “Confirm”.
2-6. Select your marketplace
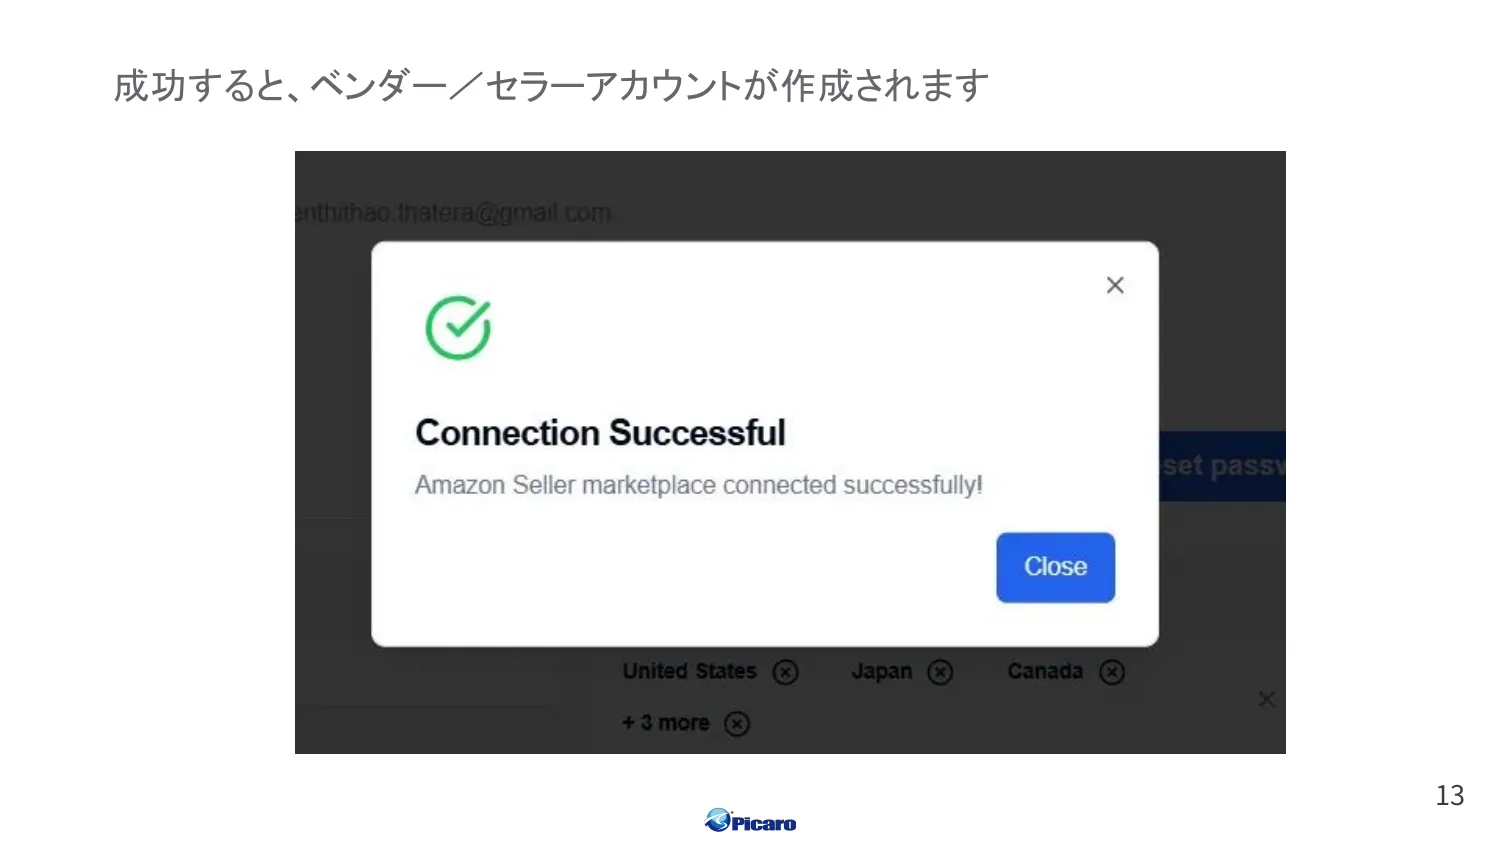
Section titled “2-6. Select your marketplace”You’ll be returned to Picaro.AI automatically. On the marketplace selection screen, choose the appropriate marketplace (e.g. Amazon.co.jp) and click “Save Marketplace”.
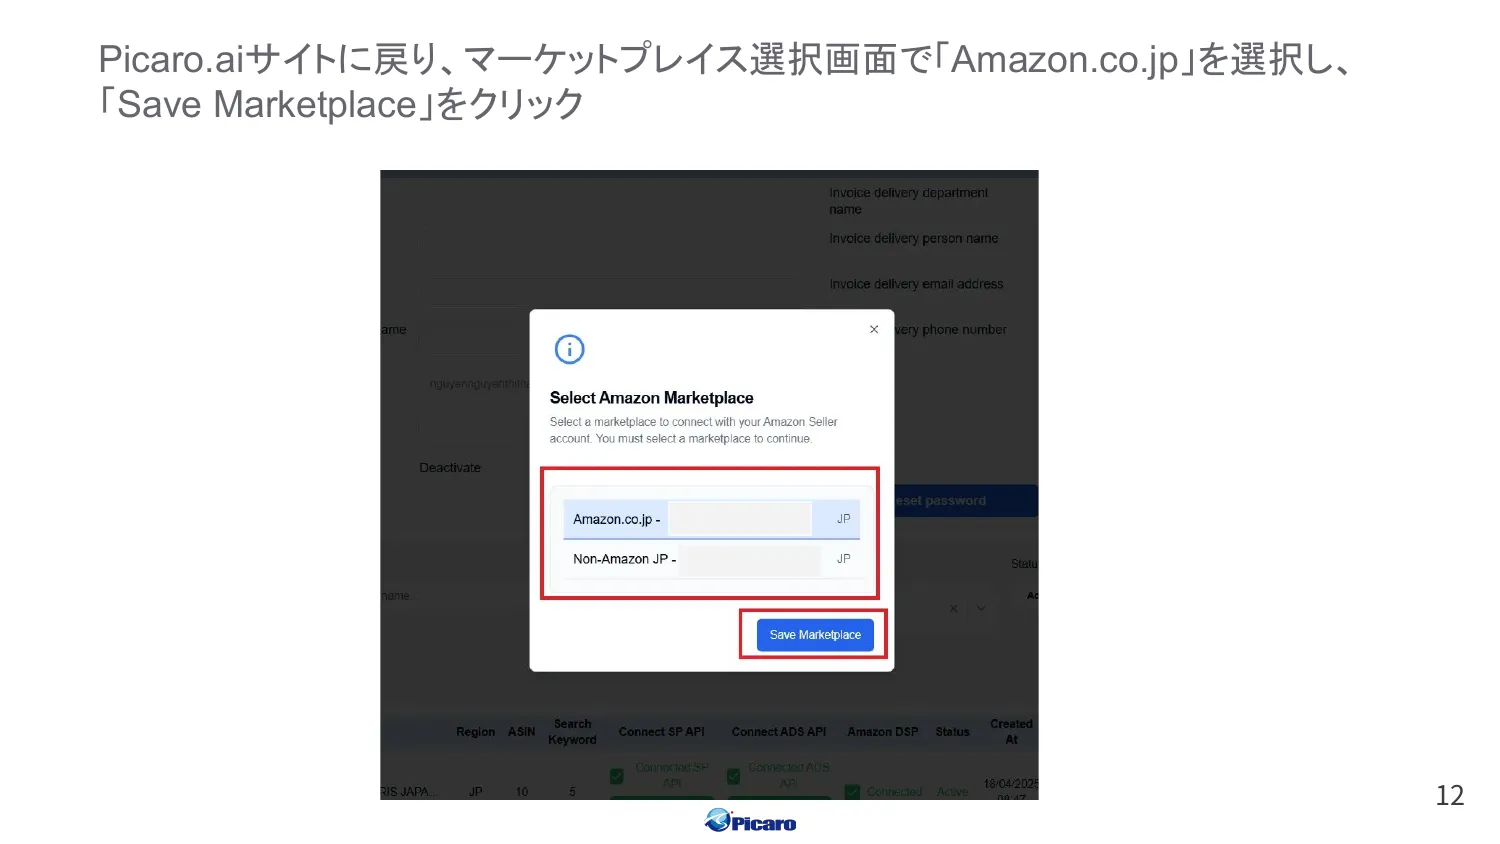
Your Vendor / Seller account is now created.
Step 3: Connect the Advertising API
Section titled “Step 3: Connect the Advertising API”To bring advertising data into Picaro.AI, connect the Amazon Ads API.
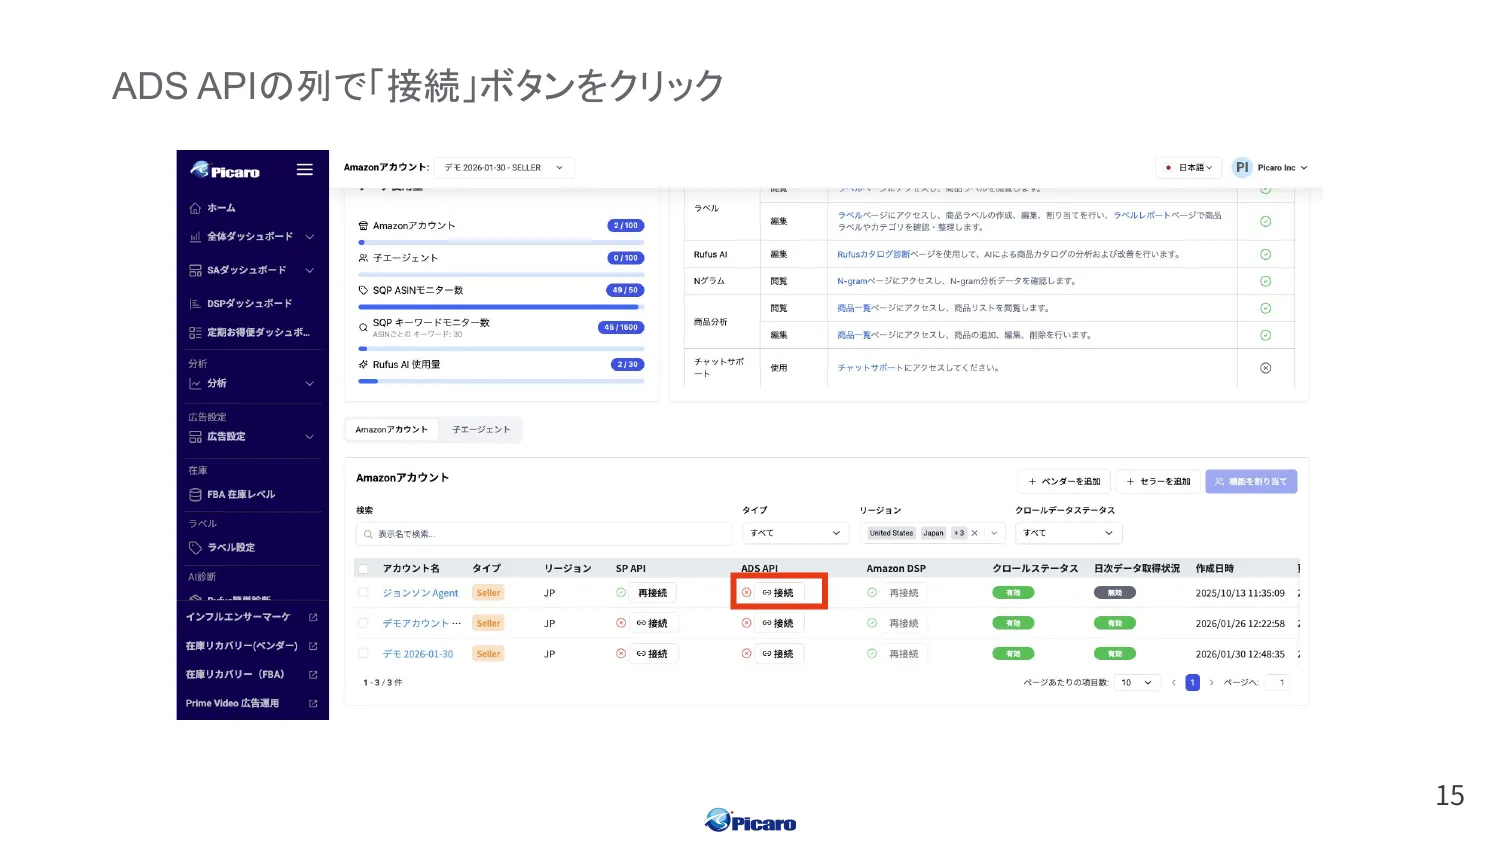
3-1. Click “Connect” on the Ads API row
Section titled “3-1. Click “Connect” on the Ads API row”In your account settings screen, click “Connect” in the ADS API row.
3-2. Sign in to Vendor / Seller Central
Section titled “3-2. Sign in to Vendor / Seller Central”Same flow as Step 2-4.
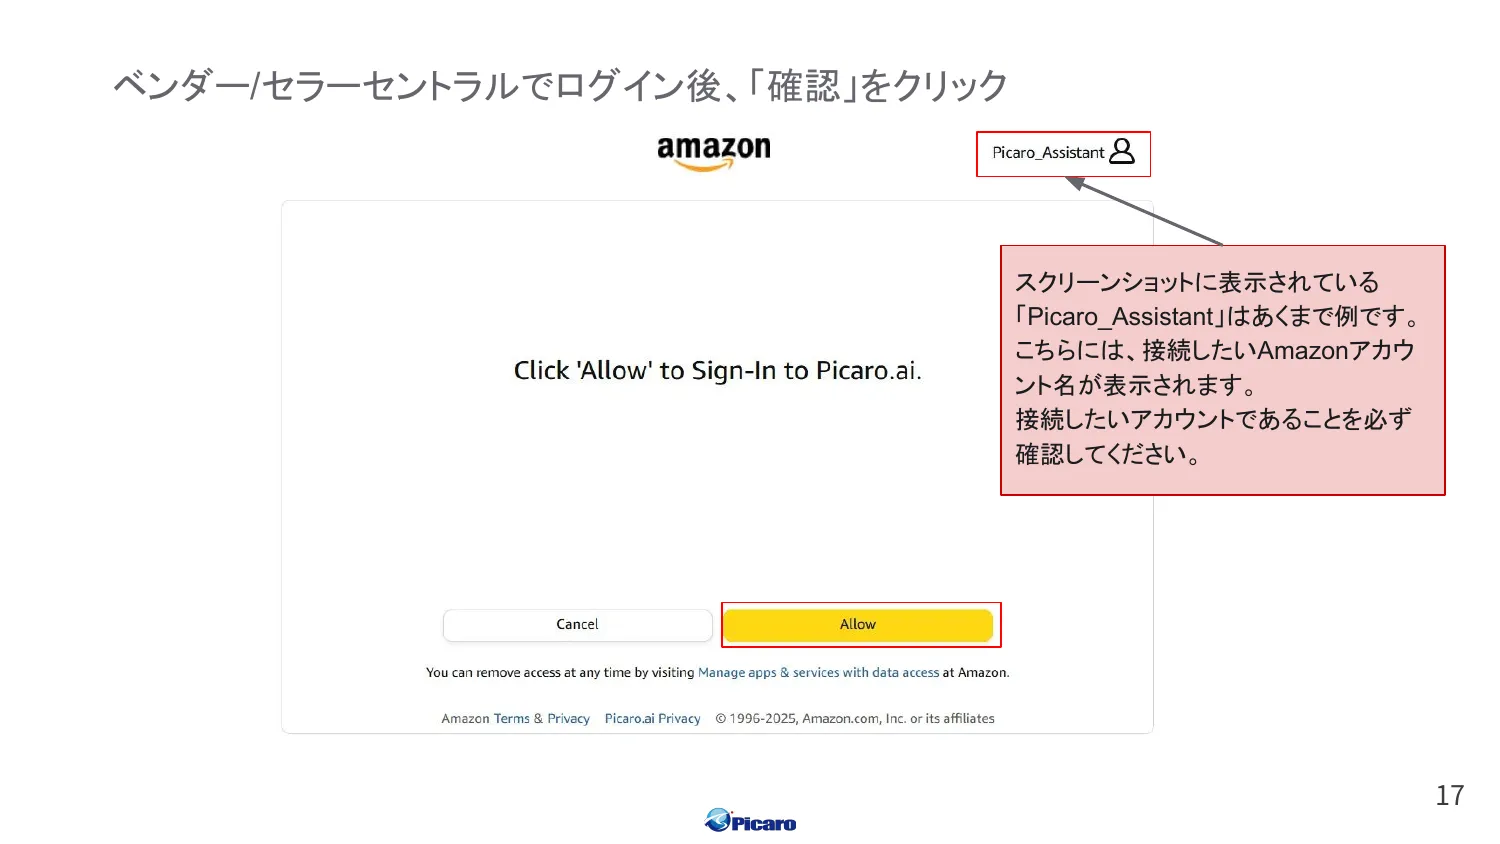
3-3. Verify and click “Confirm”
Section titled “3-3. Verify and click “Confirm””Make sure the account name on the consent screen matches the Amazon account you want to connect to Picaro.AI, then click “Confirm”.
3-4. Select an Amazon Ads profile
Section titled “3-4. Select an Amazon Ads profile”Back in Picaro.AI, a profile selection modal appears. Choose the advertising profile you want to connect.

Setup Complete
Section titled “Setup Complete”Once all APIs are connected, setup is done. Nice work!
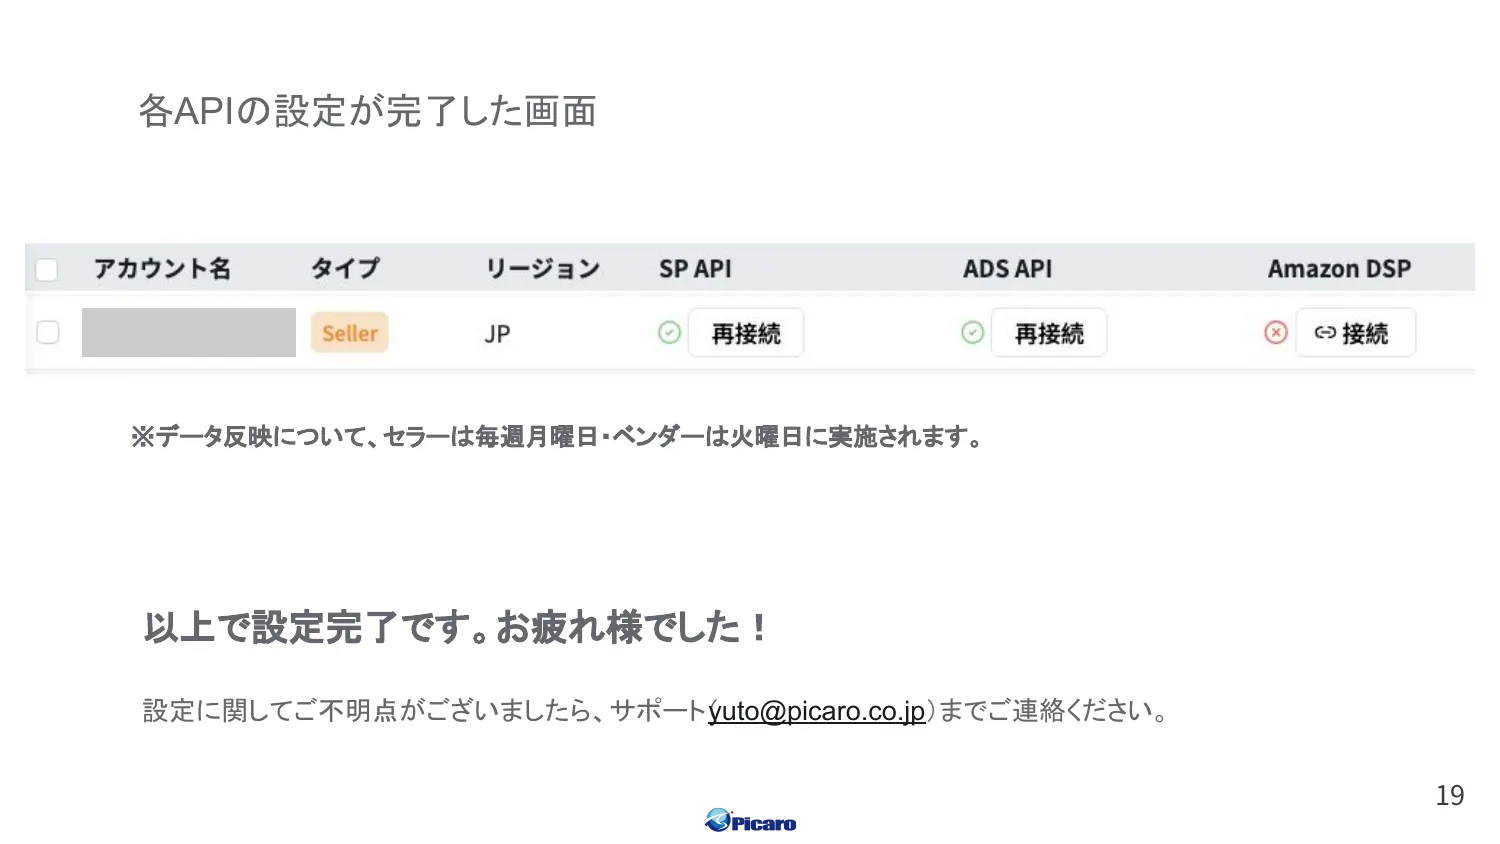
Data refresh schedule
Section titled “Data refresh schedule”| Account type | Data refresh |
|---|---|
| Seller | Every Monday |
| Vendor | Every Tuesday |
Initial data will appear in the dashboard on the next refresh day after connection.
Next steps
Section titled “Next steps”Now that your accounts are connected, get ready to call Picaro.AI from your AI agent.
- MCP Quick Start — How to start using Picaro.AI from Claude / ChatGPT
- Prompt Library — Prompts organized by operational workflow
Support
Section titled “Support”For any setup questions, reach out via the contact form.